
Gitlab快速入门
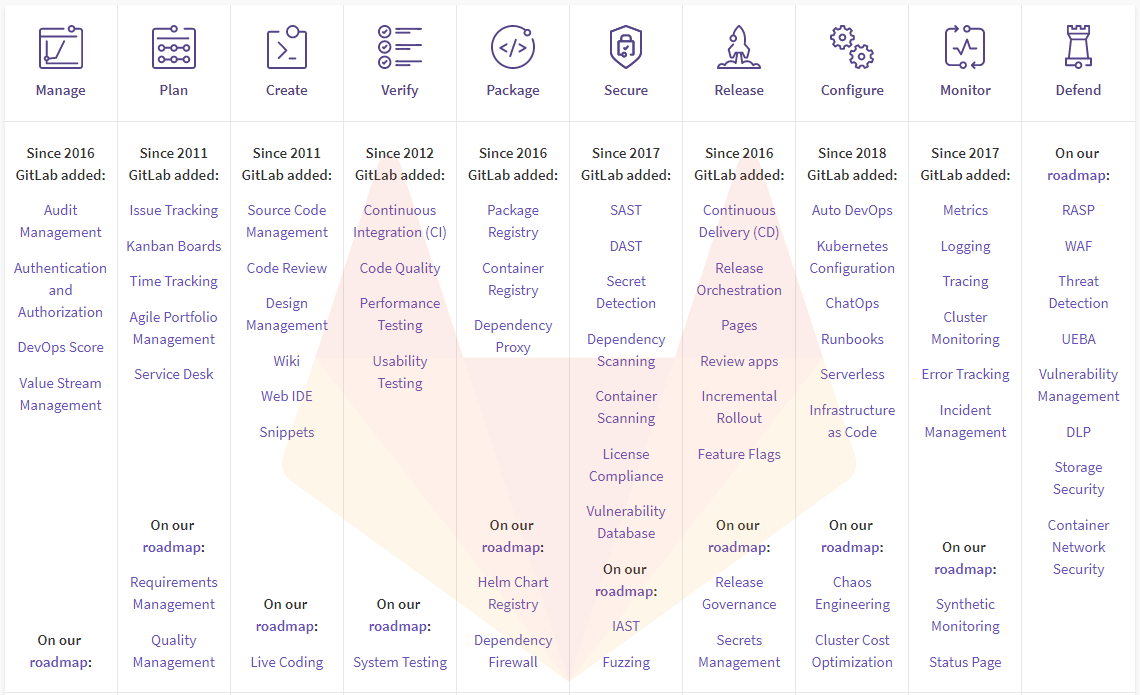
GitLab 是一个完整的 DevOps 平台软件。 使用 GitLab,您可以获得开箱即用的完整 CI/CD 工具链。极狐 GitLab 是本地化的版本,基于 GitLab EE 和极狐 GitLab 在国内独立运营的 JH 代码仓库构建,产品的企业级订阅许可证、源代码管理、支付系统等均在中国境内管理,受中国法律保护。
部署 创达睿通 提供的 GitLab 或 极狐 GitLab 之后,请参考下面的步骤快速入门。
准备
在云控制台获取您的 服务器公网IP地址
在云控制台安全组中,确保 Inbound(入)规则 下的 TCP:80 端口已经开启
在服务器中查看 GitLab 的 默认管理员账号和密码
若想用域名访问 GitLab,务必先完成 域名五步设置 过程
GitLab 初始化向导
详细步骤
本地电脑浏览器访问:http://域名 或 *http://服务器公网IP*,进入初始化页面
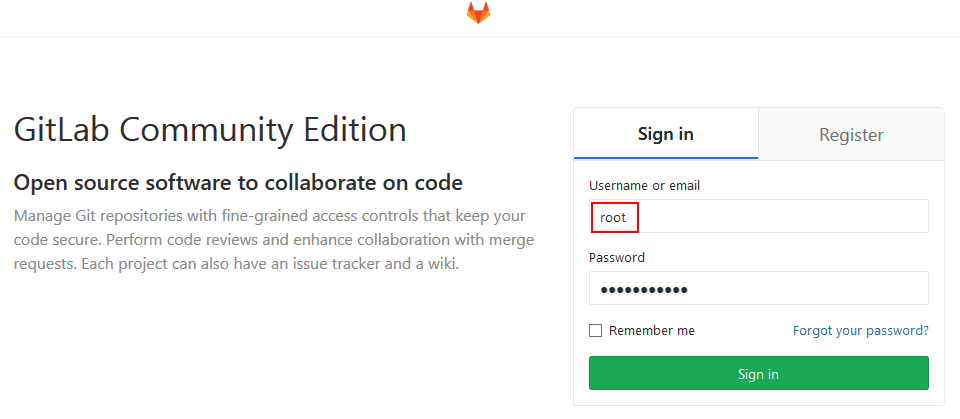
一般服务器启动后需要1到2分钟才能显示 Gitlab 页面,如果 GitLab 页面还无法显示的情况下强制重启服务器会导致重新生成新密码,导致密码无法登陆
输入账号密码,进入 GitLab 控制台
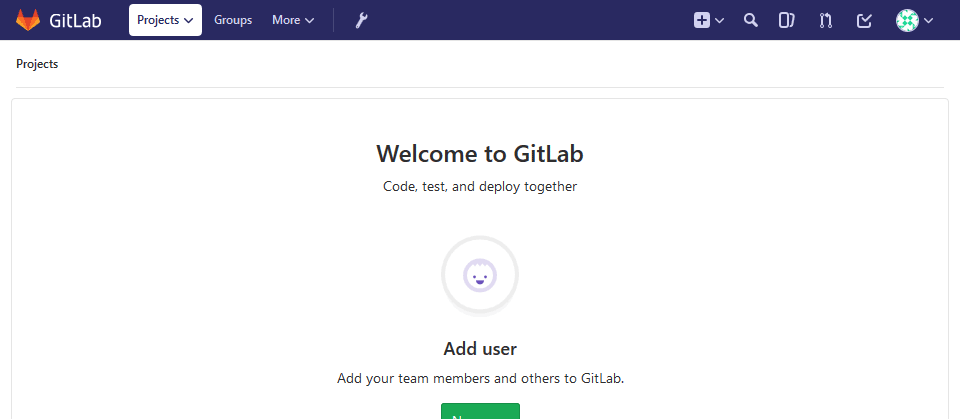
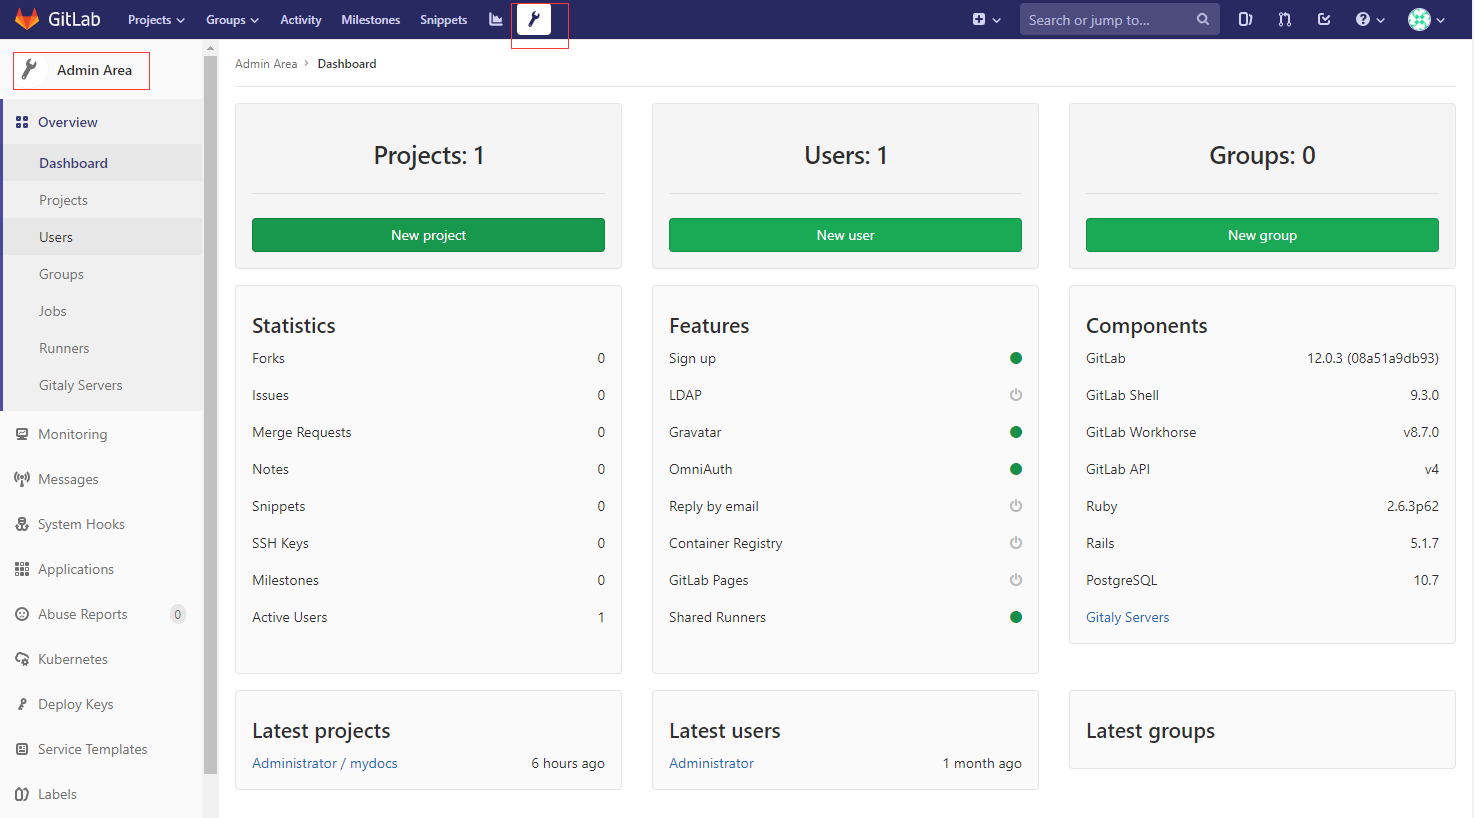
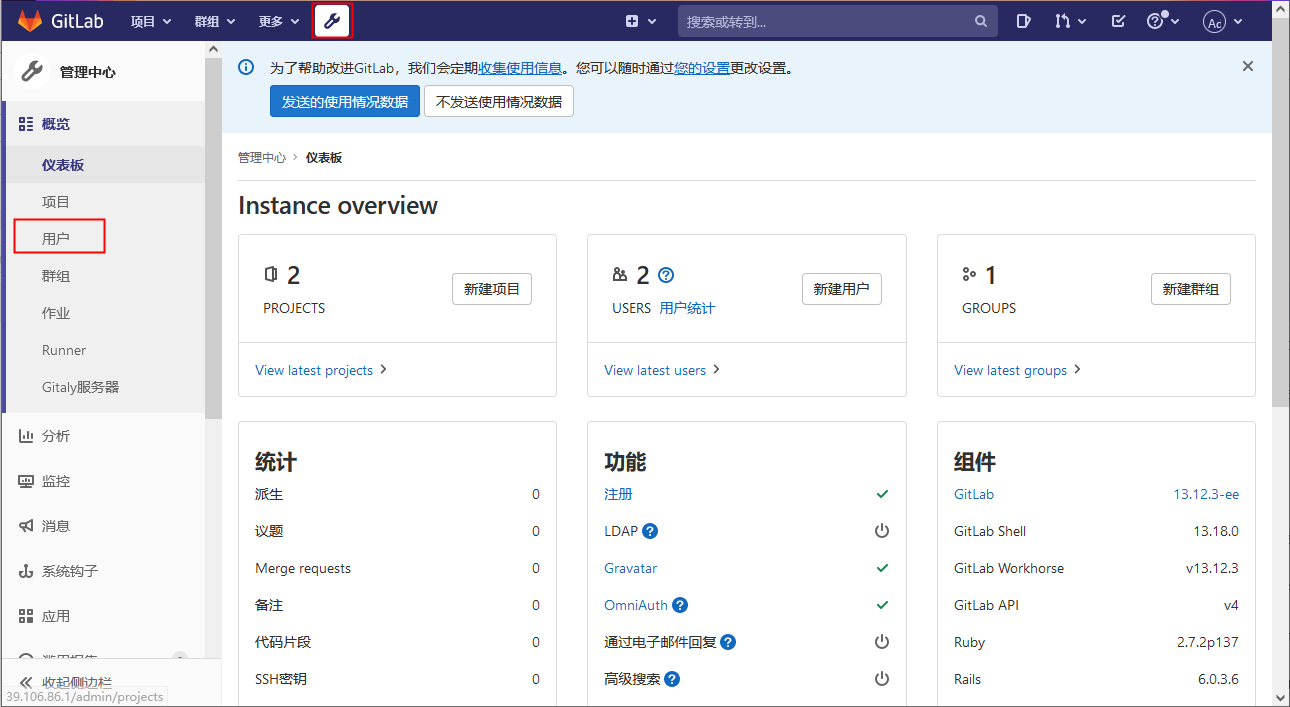
进入管理设置面板(Admin Area)
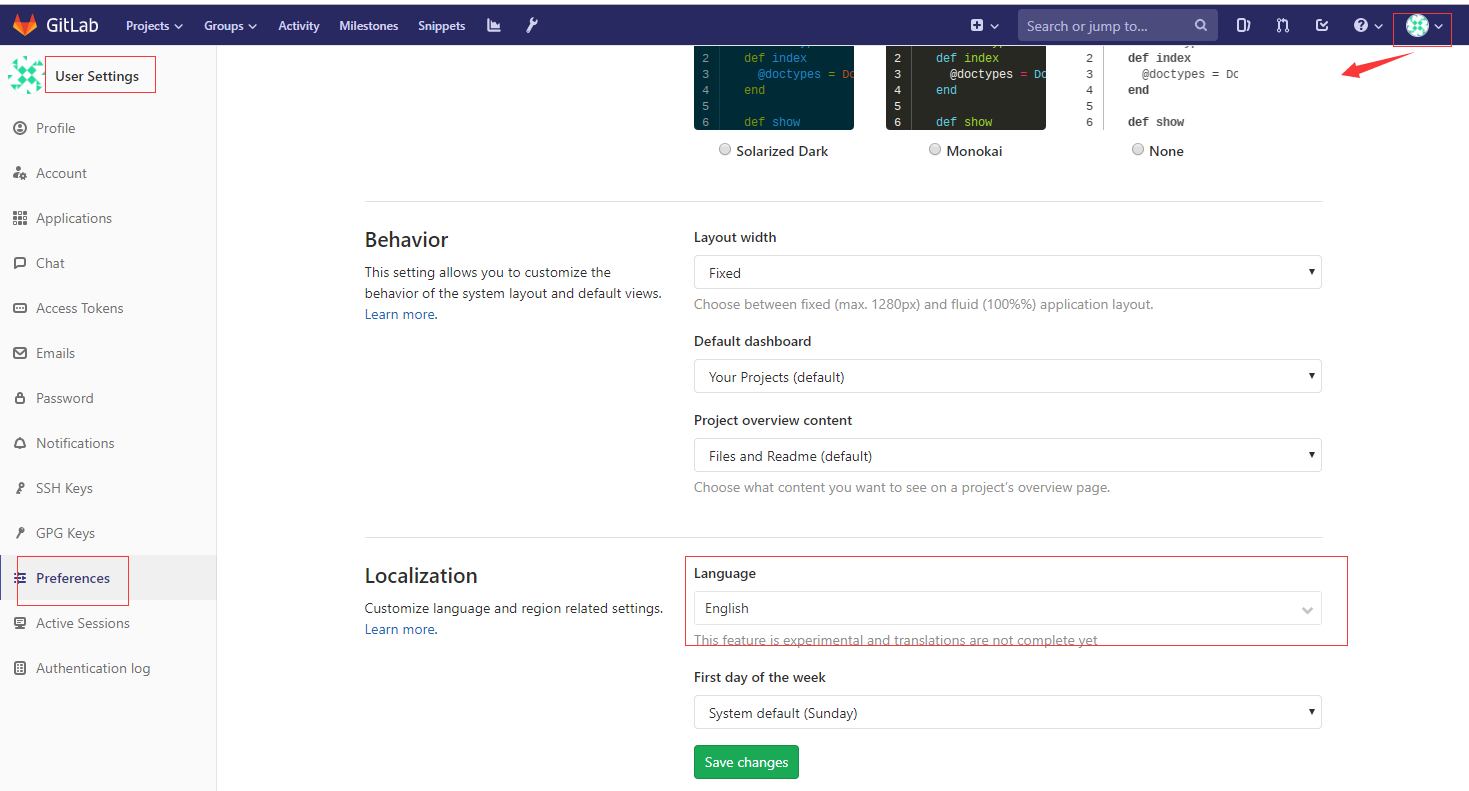
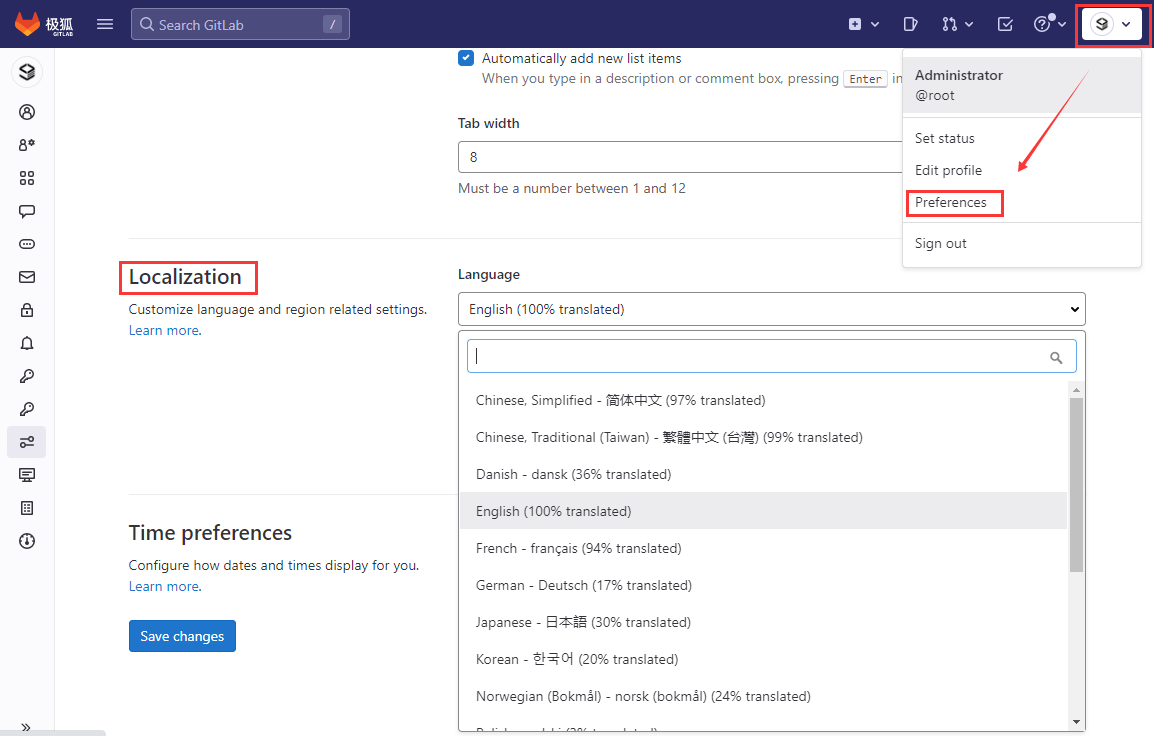
语言设置:【User Settings】>【Preferences】,设置自己喜欢的语言(包含中文)
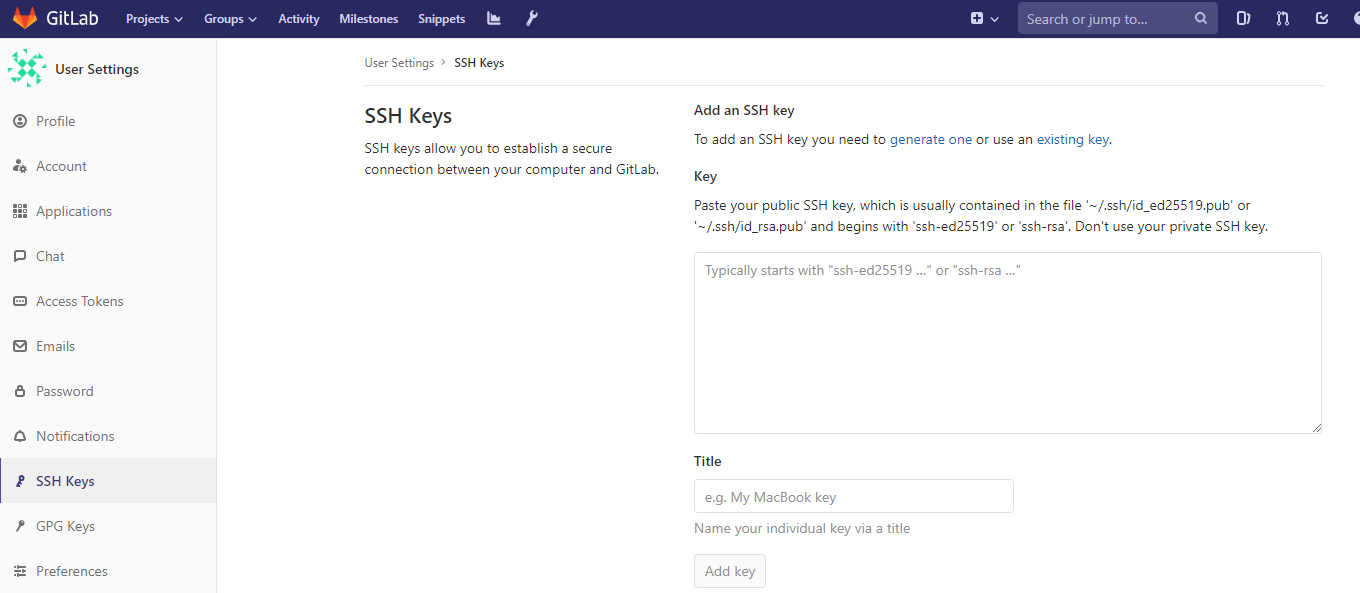
SSH key 设置:【User Settings】>【SSH key】
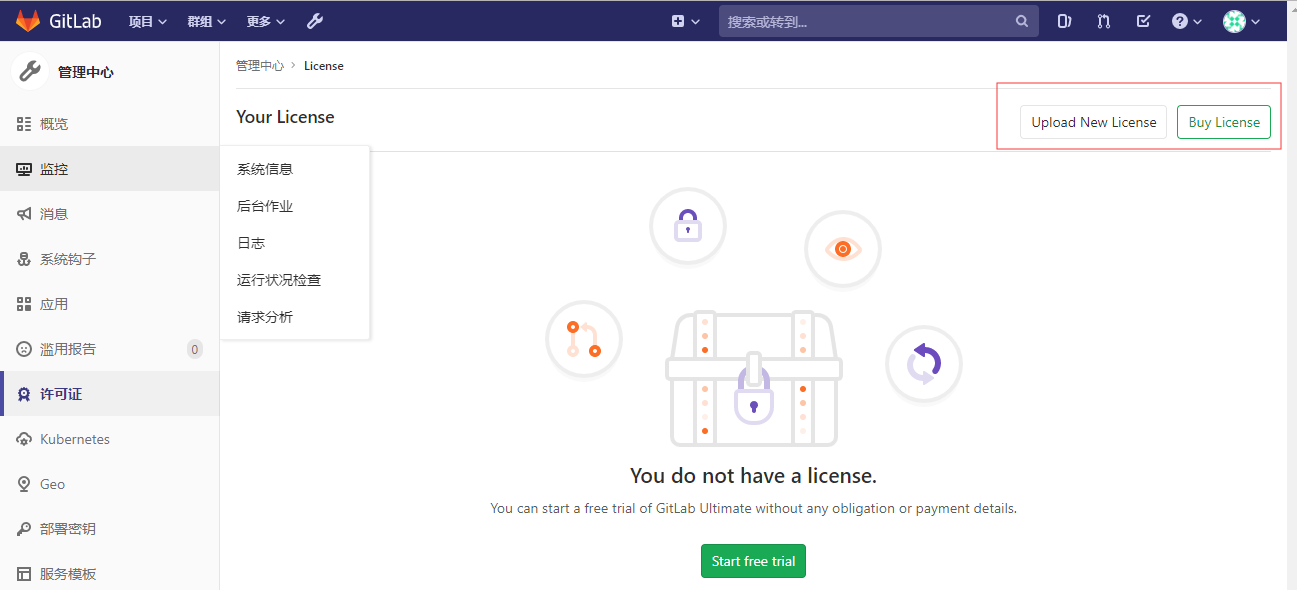
如果你部署的是 GitLab-EE(企业版),通过:【管理中心】>【许可证】导入后,试用或启用企业版
设置 GitLab 仓库地址
需要了解更多 GitLab 的使用,请参考官方文档:GitLab Documentation
组合应用
如果您安装了 创达睿通 提供的 GitLab 和其他 DevOps 的组合应用,请提前获取 端口和账号密码 ,并完成它们的初始化过程。
出现问题?
若碰到问题,请第一时刻联系 技术支持。也可以先参考下面列出的问题定位或 FAQ 尝试快速解决问题:
GitLab能打开,但总是出现 502 错误?
参阅:联系 技术支持
GitLab 每次启动需等1分钟才能使用?
参阅:联系 技术支持
GitLab 使用入门
下面介绍 Gitlab 在团队管理、权限管理、代码管理等方面的应用。
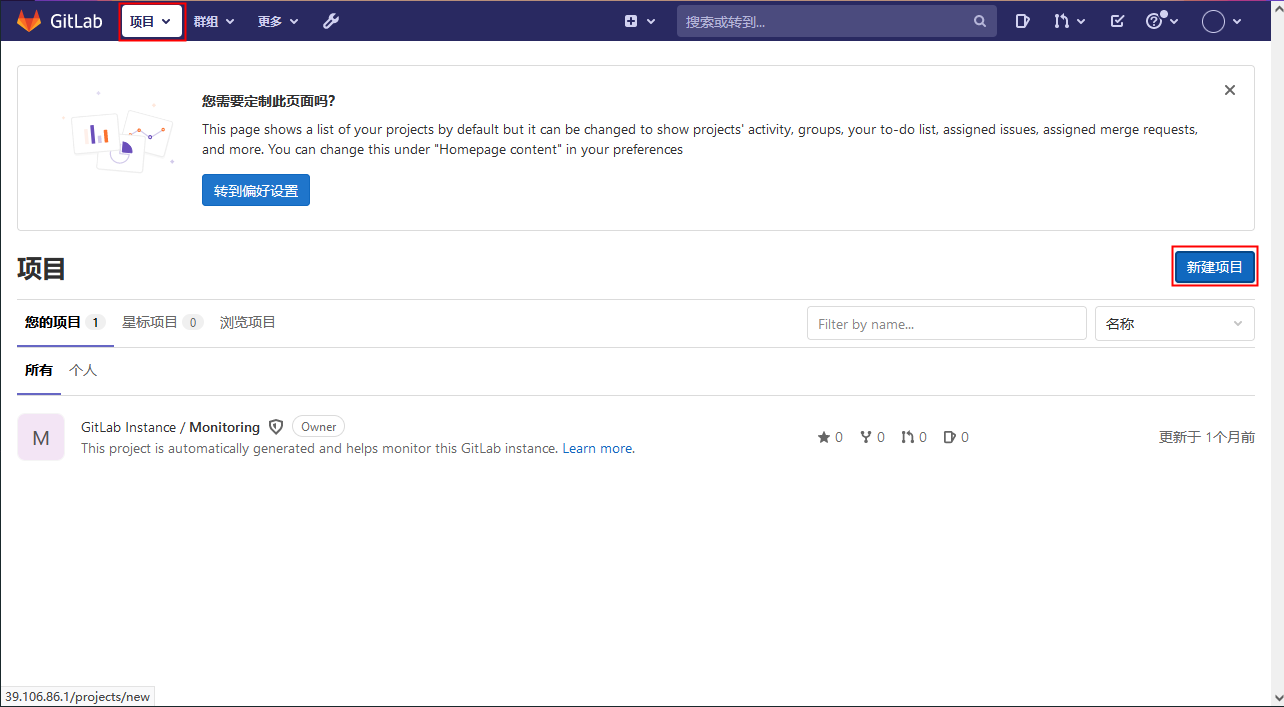
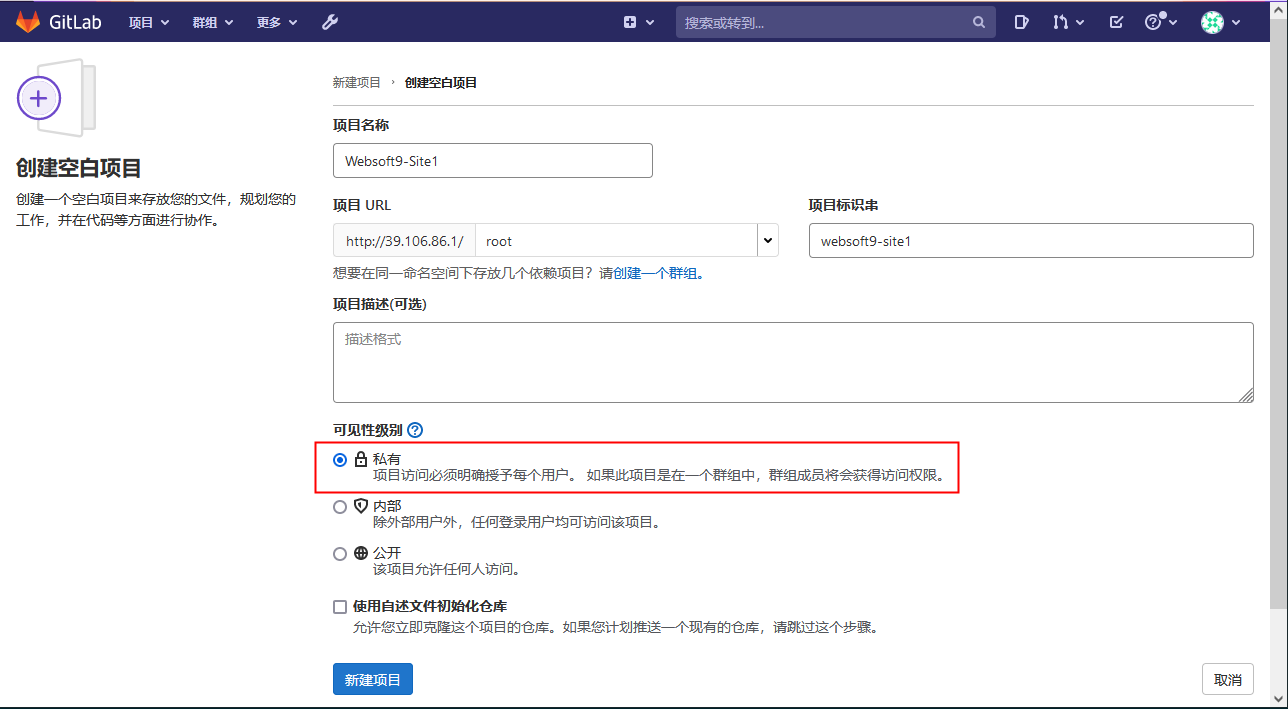
项目管理:管理员新建项目,并进行项目初始化、添加开发分支 dev ,不对开发人员开放主分支 master
创建 cdrt-Site1 项目
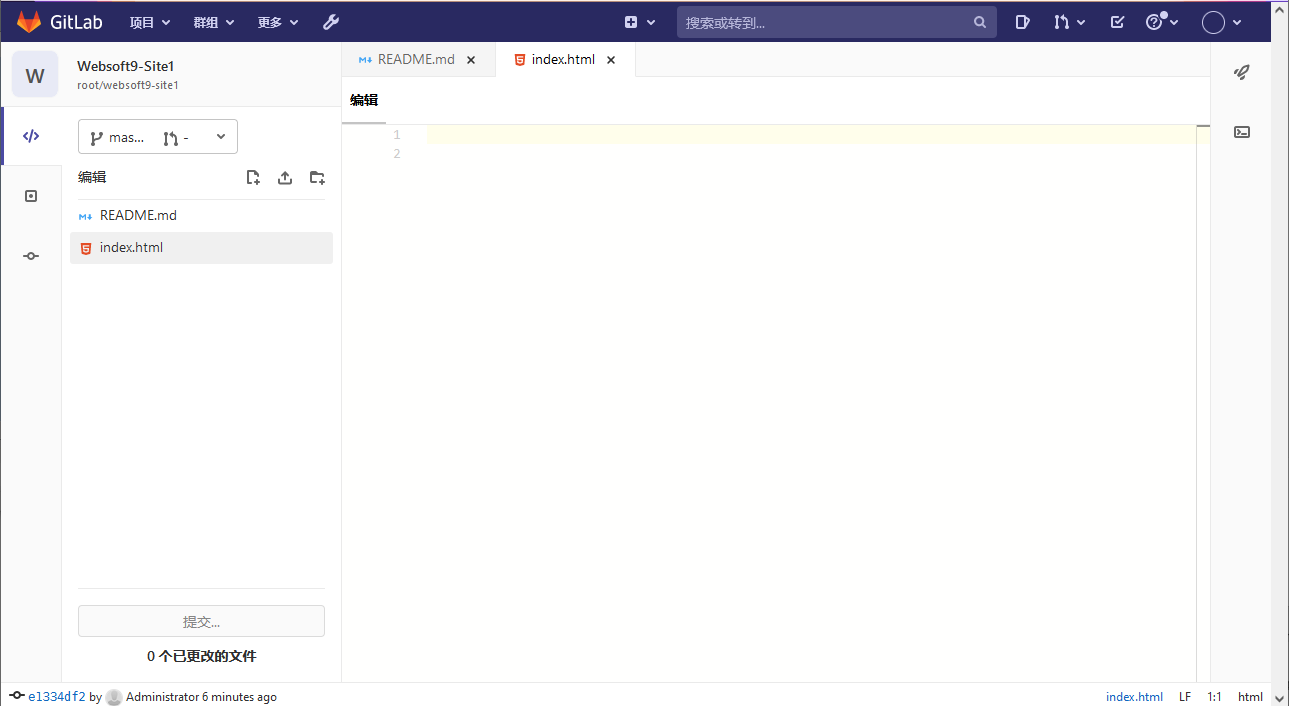
初始化项目,添加自述文件 README.md 和 index.html 页面,并提交
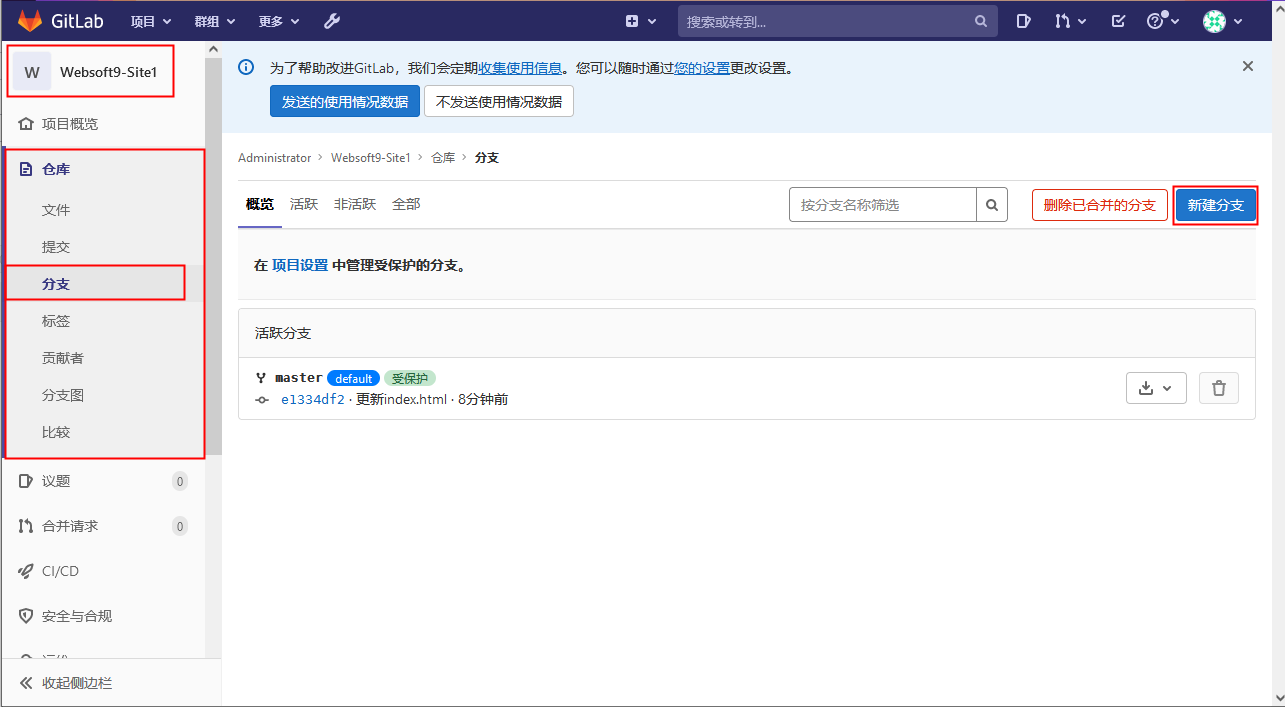
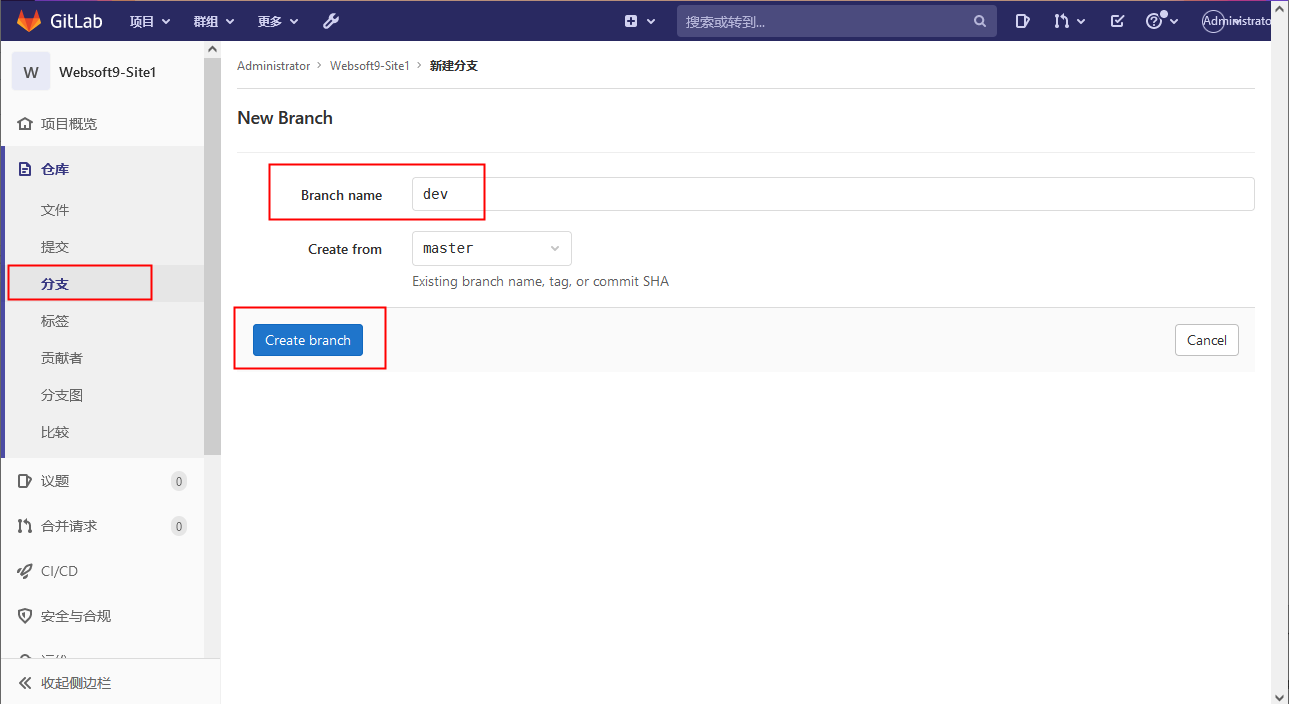
新建开发分支 dev
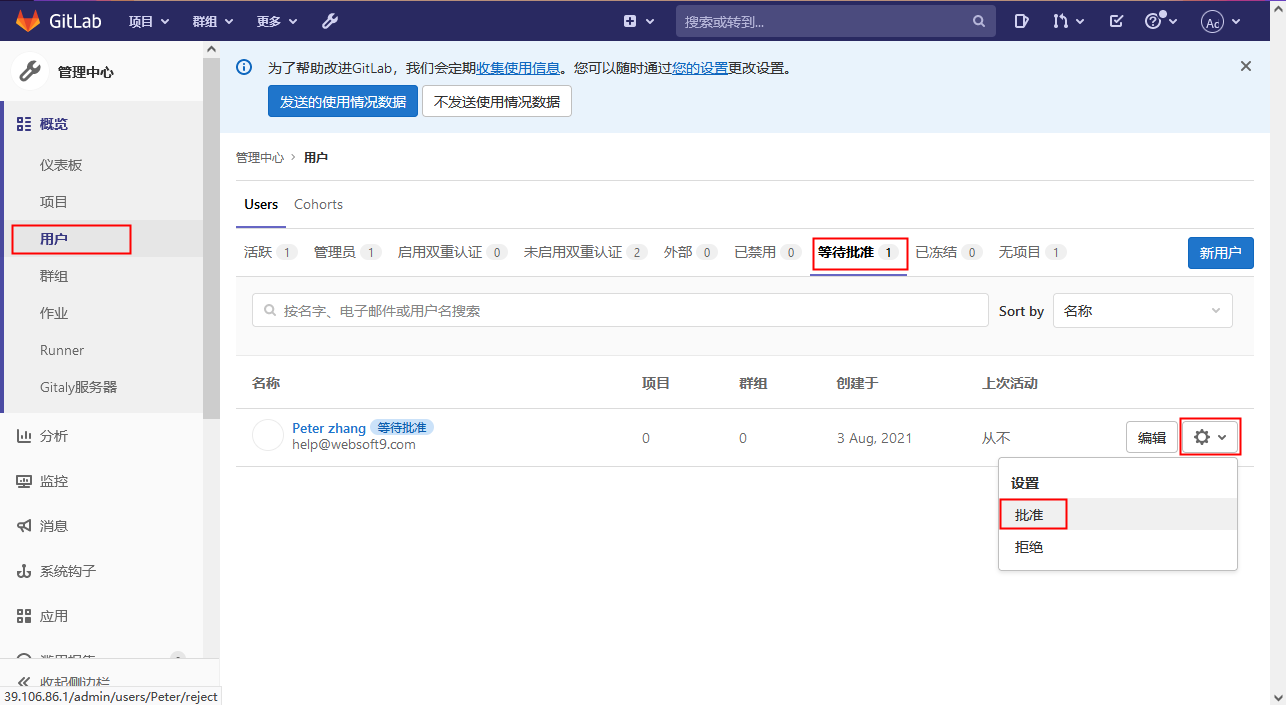
成员管理:团队成员在登录页面注册账号,管理员在后台激活用户,并在项目成员中邀请用户,配置权限。用户须激活后才能登录系统。
成员注册
管理员激活注册用户
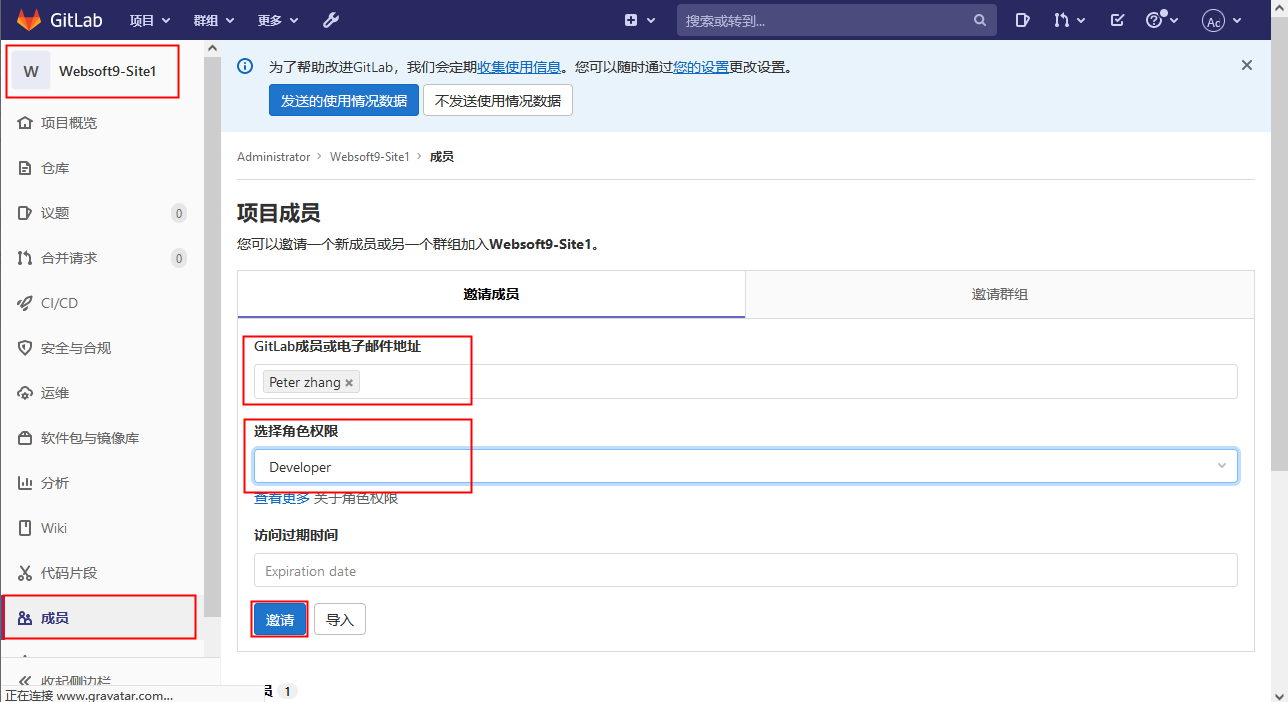
管理员邀请用户加入项目组,分配权限

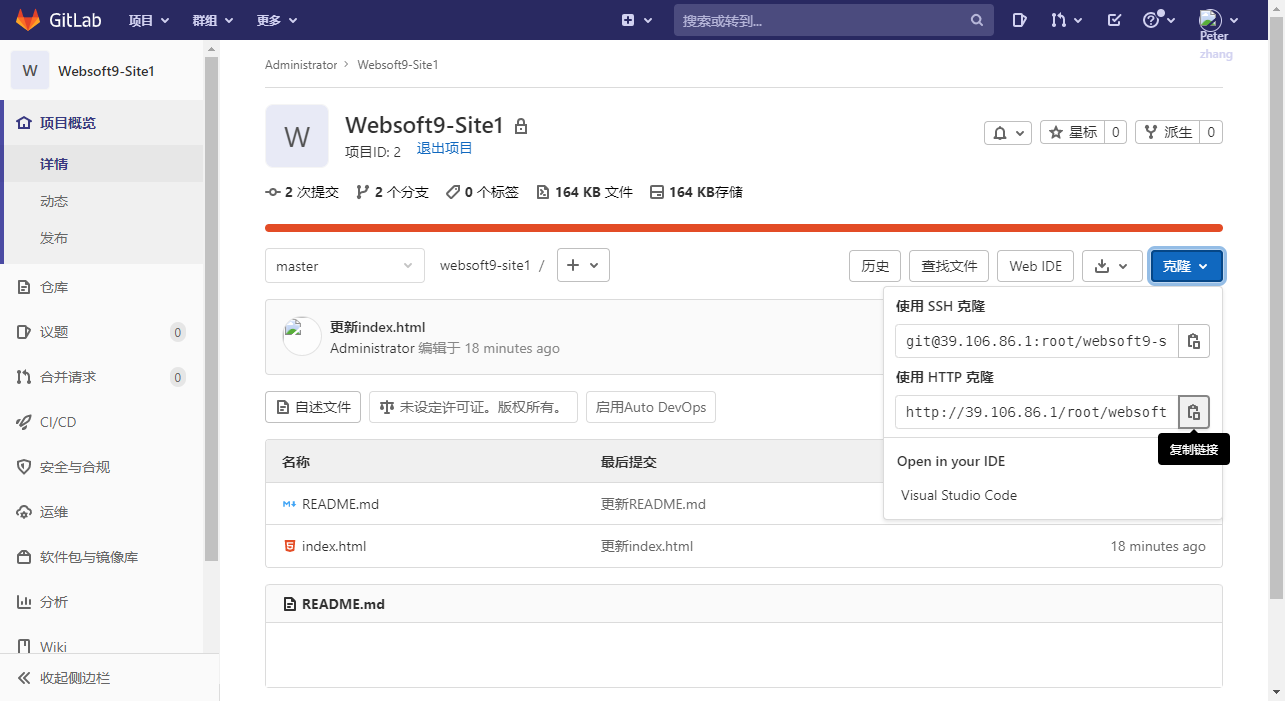
代码管理: 项目成员负责index.html页面开发, 通过 git clone 项目到本地 ,在vs code 开发。 打开 Git Base 工具,通过 git clone 将项目克隆本地
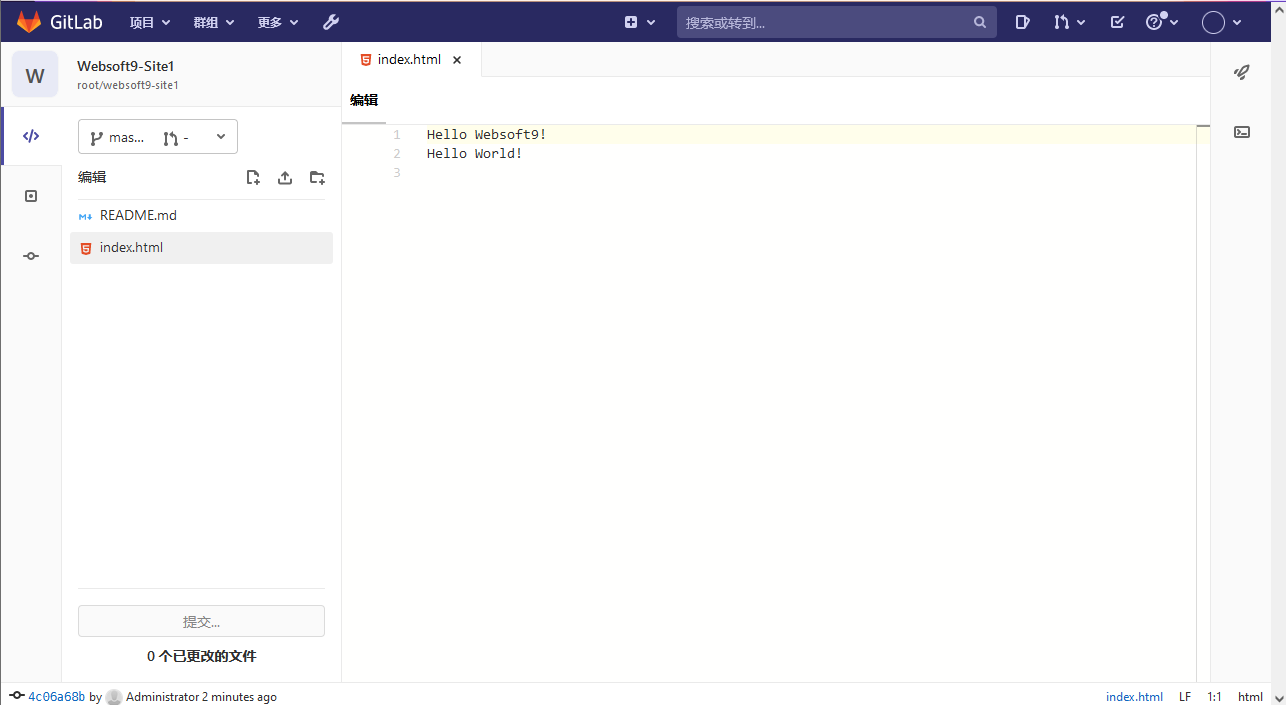
gitlab 在 vs code 中打开项目,编辑index.html
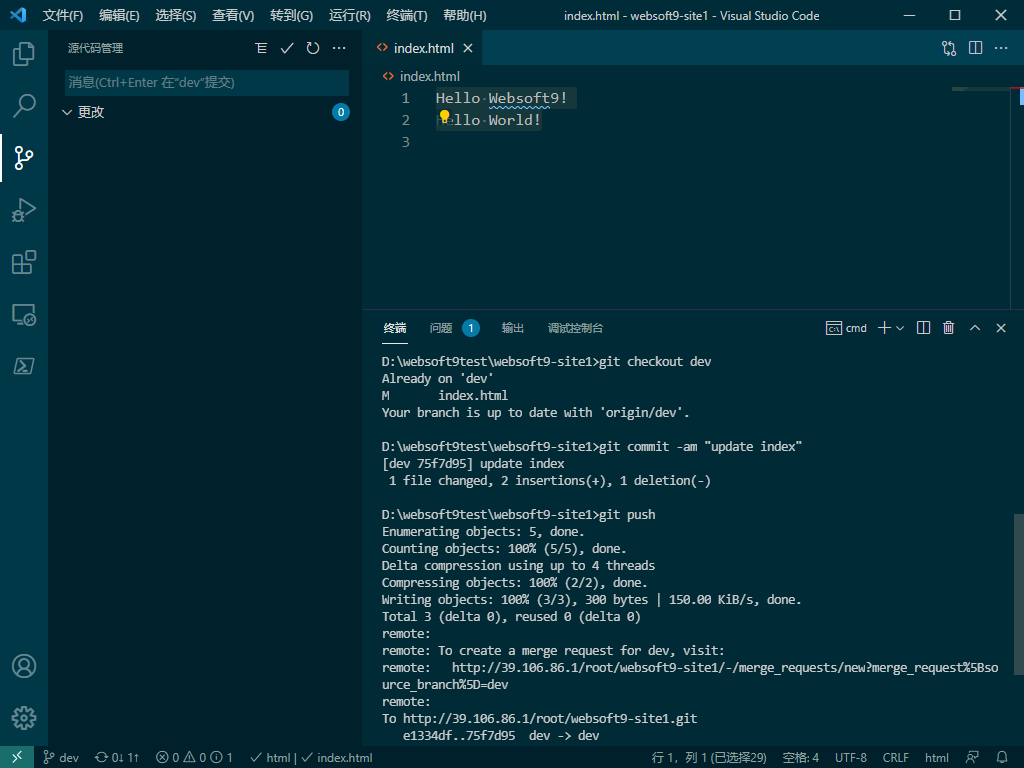
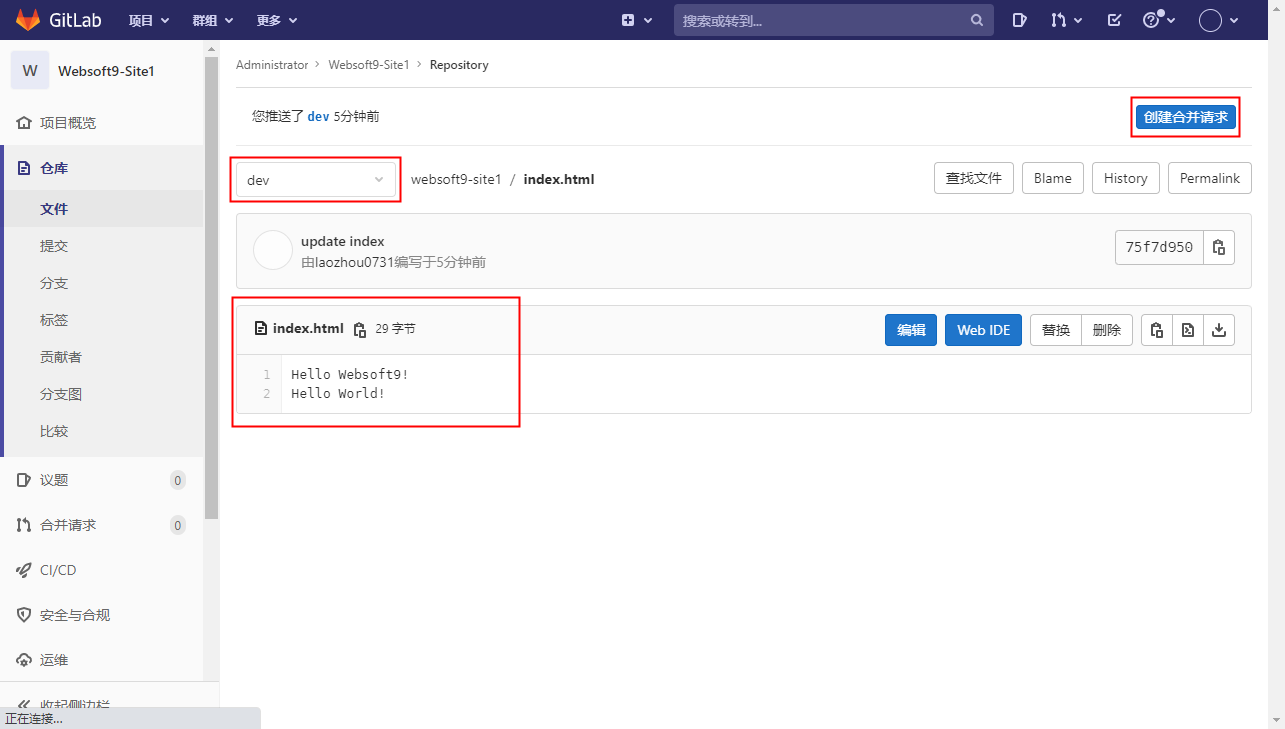
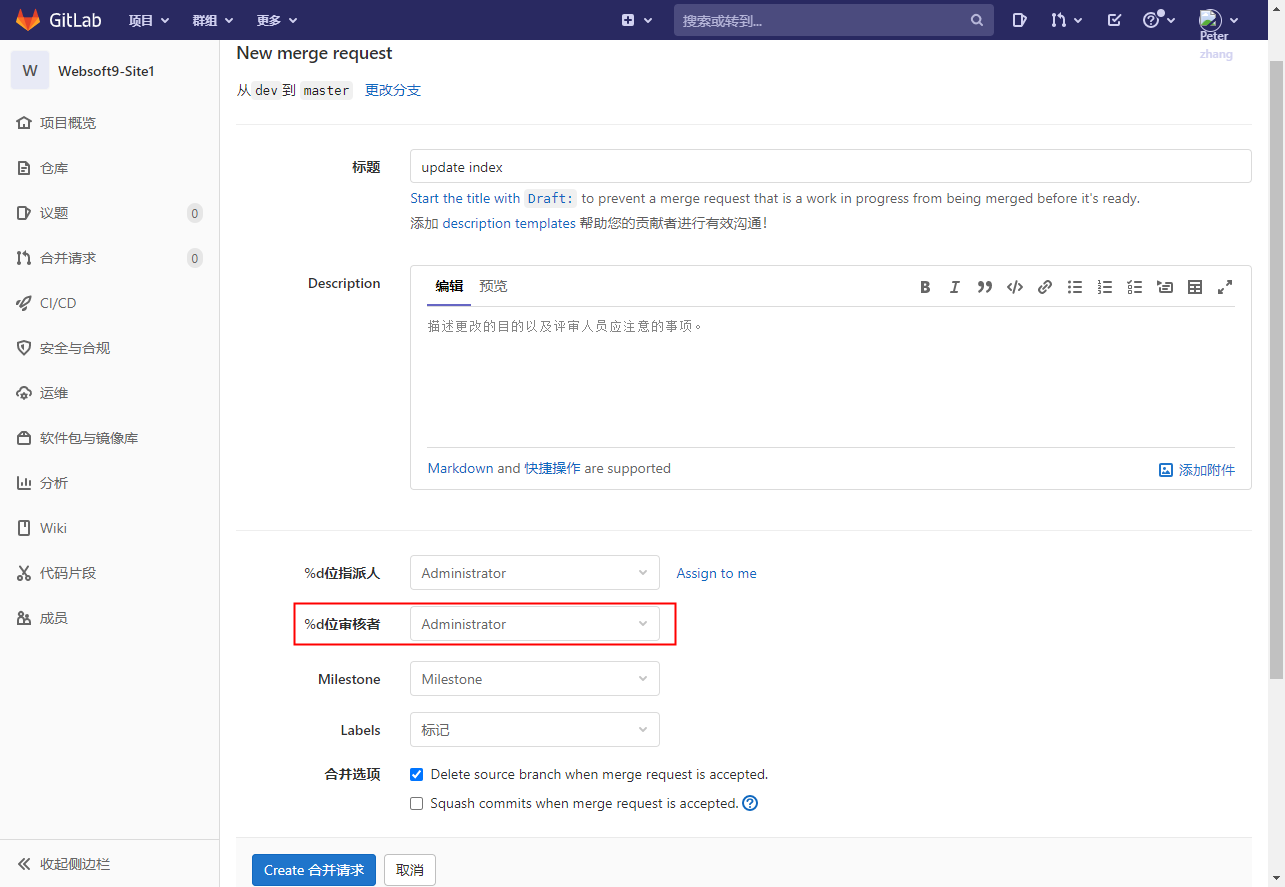
gitlab 编辑完成,提交本地代码到服务器。开发账号登录 gitlab ,查看更新并创建合并请求
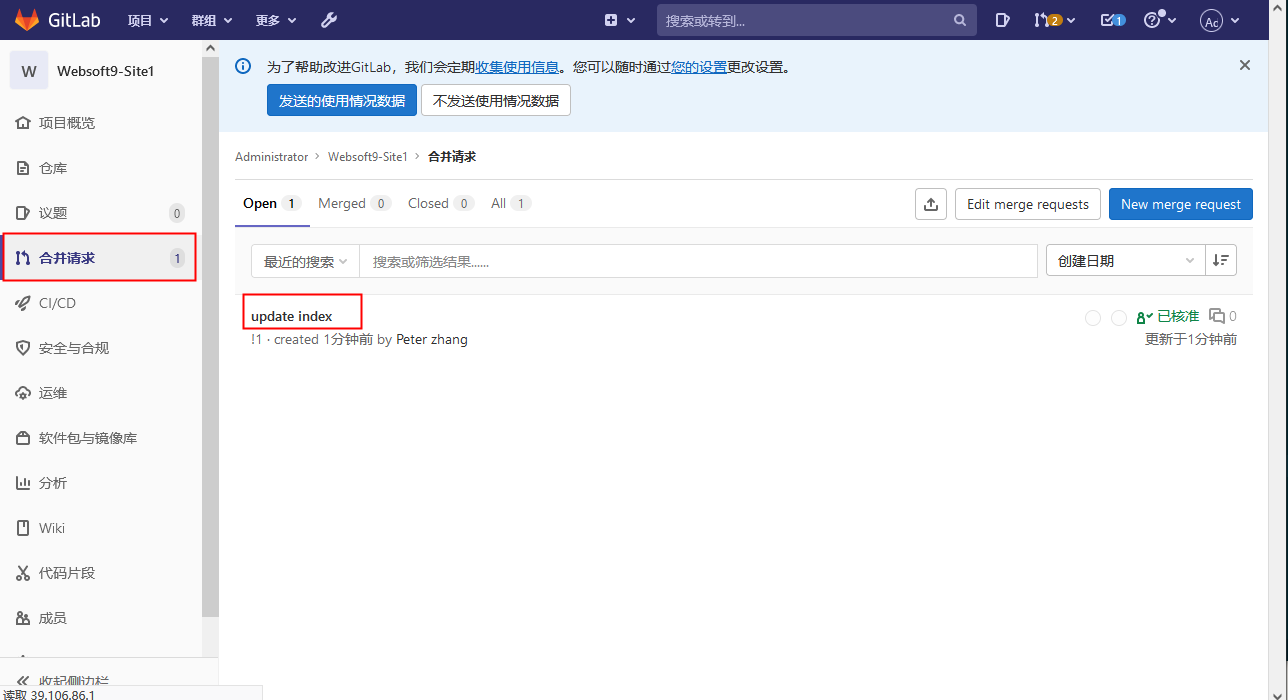
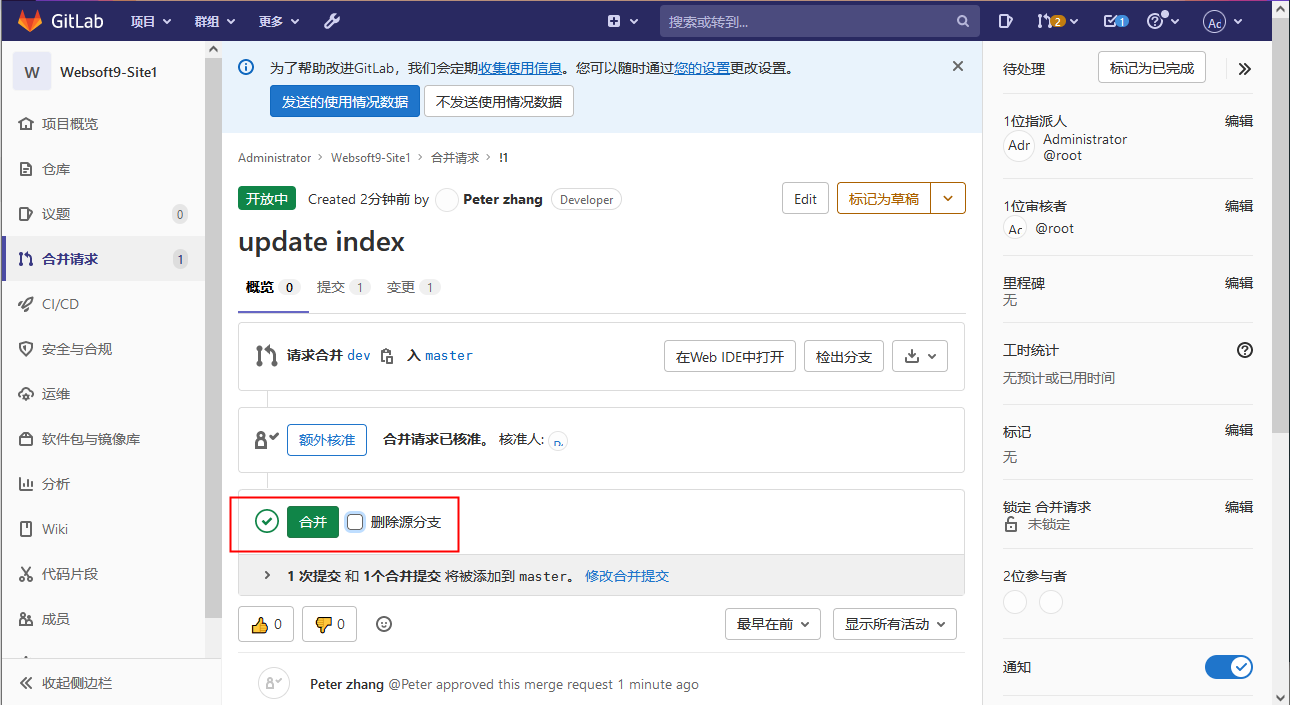
管理员登录 gitlab 合并请求
GitLab 常用操作
设置 GitLab 仓库地址
在初始化之前的 准备 环节,如果您已经完成 域名五步设置,GitLab 可以域名访问,但是 GitLab 仓库的网址还不是用户自己的域名。
因此,还需要参考下面的步骤设置 GitLab 仓库地址:
通过 SSH 或 SFTP 登录云服务器
修改 GitLab 配置文件,将 external_url 项的值 http://gitlab.example.com 修改为你的域名
保存配置文件,重启下面的服务
设置 GitLab 仓库的 HTTPS
GitLab 仓库的 HTTPS 不等同于 GitLab 自身的 HTTPS,前置还需额外设置:Enabling HTTPS
配置 SMTP
参考 GitLab 官方提供的 SMTP Setting 范例 ,准备好 SMTP 参数
通过 SFTP 连接服务器,修改 GitLab 配置文件:/etc/gitlab/gitlab.rb
重启服务后生效
重置管理员密码
忘记管理员密码时,请参考如下方案重置密码(方案来源):
使用 SSH 登陆 GitLab 服务器
输入
gitlab-rails console命令,根据提示完成后续步骤
极狐 Gitlab 设置中文
GitLab 参数
GitLab 应用中包含 Docker, Portainer 等组件,可通过 通用参数表 查看路径、服务、端口等参数。
下面是一个简化的架构图,可用于了解 GitLab 的组件架构。
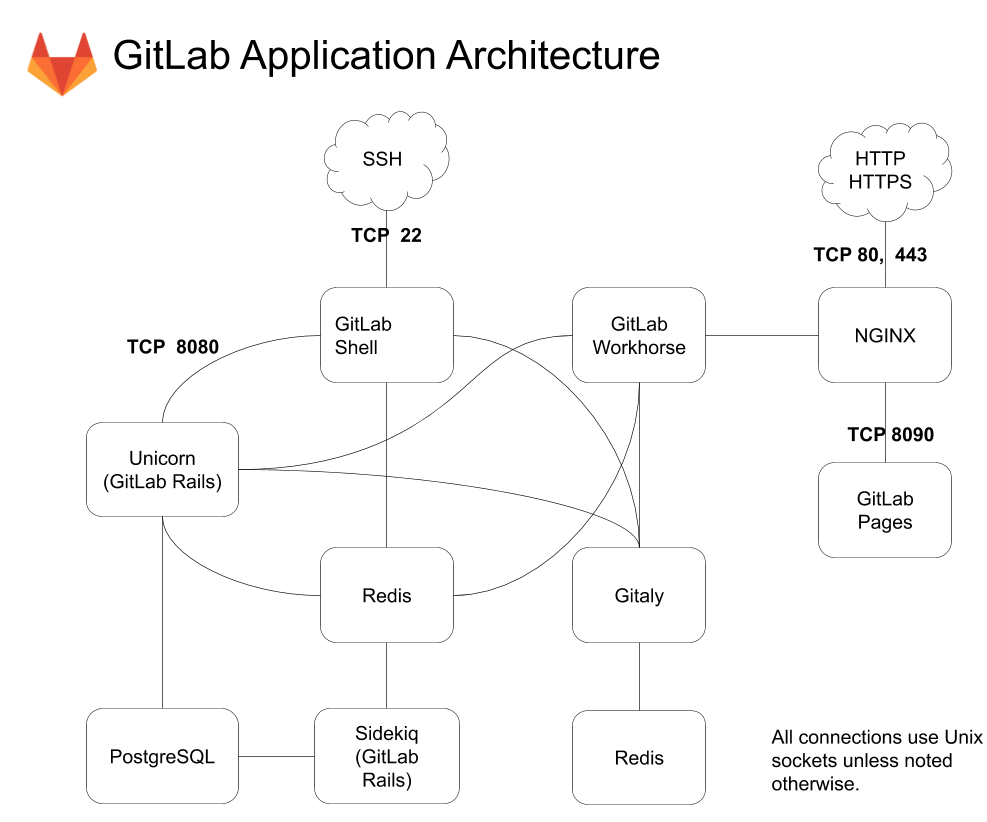
-nginx:静态web服务器。 -gitlab-shell:用于处理Git命令和修改authorized keys列表。 -gitlab-workhorse: 轻量级的反向代理服务器。 -logrotate:日志文件管理工具。 -postgresql:数据库。 -redis:缓存数据库。 -sidekiq:用于在后台执行队列任务(异步执行)。 -unicorn:An HTTP server for Rack applications,GitLab Rails应用是托管在这个服务器上面的。
GitLab 包含数十种组件(查看),通过容器内路径 /opt/gitlab/version-manifest.txt 查看所有组件名称和版本
通过运行 docker ps,查看 GitLab 运行时所有的服务组件:
路径
GitLab 安装目录: /data/apps/gitlab GitLab 数据目录: /data/apps/gitlab/data/gitlab_data GitLab 日志目录: /data/apps/gitlab/data/gitlab_logs GitLab 配置文件: /data/apps/gitlab/data/gitlab_config/gitlab.rb
端口
除 80, 443 等常见端口需开启之外,以下端口可能会用到:
暂无特殊端口
版本
服务
命令行
GitLab 提供了命令行工具 gitlab-ctl 用于全面管理和配置 GitLab
API
GitLab 提供多种 API 方式,包括:REST API, SCIM API, GraphQL API
最后更新于