> For the complete documentation index, see [llms.txt](https://docs.imdcinsights.com/llms.txt). Markdown versions of documentation pages are available by appending `.md` to page URLs; this page is available as [Markdown](https://docs.imdcinsights.com/ying-yong-zhong-xin/kai-fa-yun-wei/codeserver-kuai-su-ru-men.md).
# code-server快速入门
 部署 创达睿通 提供的 code-server 之后,请参考下面的步骤快速入门。
### 准备[](https://support.websoft9.com/docs/codeserver#%E5%87%86%E5%A4%87)
1. 在云控制台获取您的 **服务器公网IP地址**
2. 在云控制台安全组中,确保 **Inbound(入)规则** 下的 **TCP:80** 端口已经开启
3. 在服务器中查看 code-server 的 **默认账号和密码**
4. 若想用域名访问 code-server,务必先完成 **域名五步设置** 过程
### code-server 初始化向导[](https://support.websoft9.com/docs/codeserver#code-server-%E5%88%9D%E5%A7%8B%E5%8C%96%E5%90%91%E5%AF%BC)
#### 详细步骤[](https://support.websoft9.com/docs/codeserver#%E8%AF%A6%E7%BB%86%E6%AD%A5%E9%AA%A4)
1. 使用本地 Chrome 或 Firefox 浏览器访问网址:[*http://域名*](http://xn--eqrt2g/) 或 [*http://服务器公网IP*](http://xn--ip-xz4cu9bf8io83arv1b/), 进入登录页面
部署 创达睿通 提供的 code-server 之后,请参考下面的步骤快速入门。
### 准备[](https://support.websoft9.com/docs/codeserver#%E5%87%86%E5%A4%87)
1. 在云控制台获取您的 **服务器公网IP地址**
2. 在云控制台安全组中,确保 **Inbound(入)规则** 下的 **TCP:80** 端口已经开启
3. 在服务器中查看 code-server 的 **默认账号和密码**
4. 若想用域名访问 code-server,务必先完成 **域名五步设置** 过程
### code-server 初始化向导[](https://support.websoft9.com/docs/codeserver#code-server-%E5%88%9D%E5%A7%8B%E5%8C%96%E5%90%91%E5%AF%BC)
#### 详细步骤[](https://support.websoft9.com/docs/codeserver#%E8%AF%A6%E7%BB%86%E6%AD%A5%E9%AA%A4)
1. 使用本地 Chrome 或 Firefox 浏览器访问网址:[*http://域名*](http://xn--eqrt2g/) 或 [*http://服务器公网IP*](http://xn--ip-xz4cu9bf8io83arv1b/), 进入登录页面
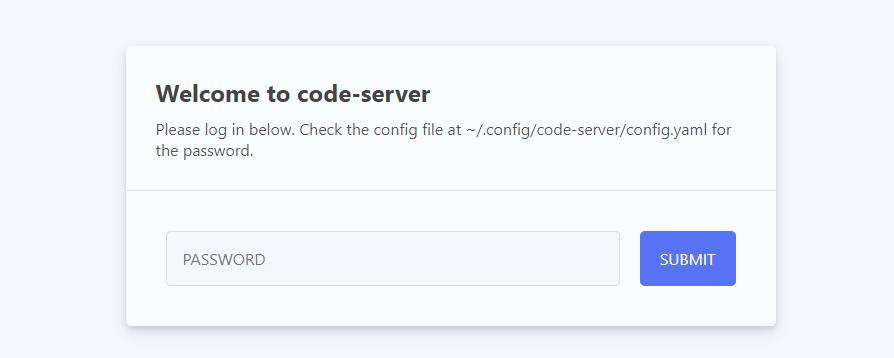 2. 输入密码,成功登录到 code-server 后台
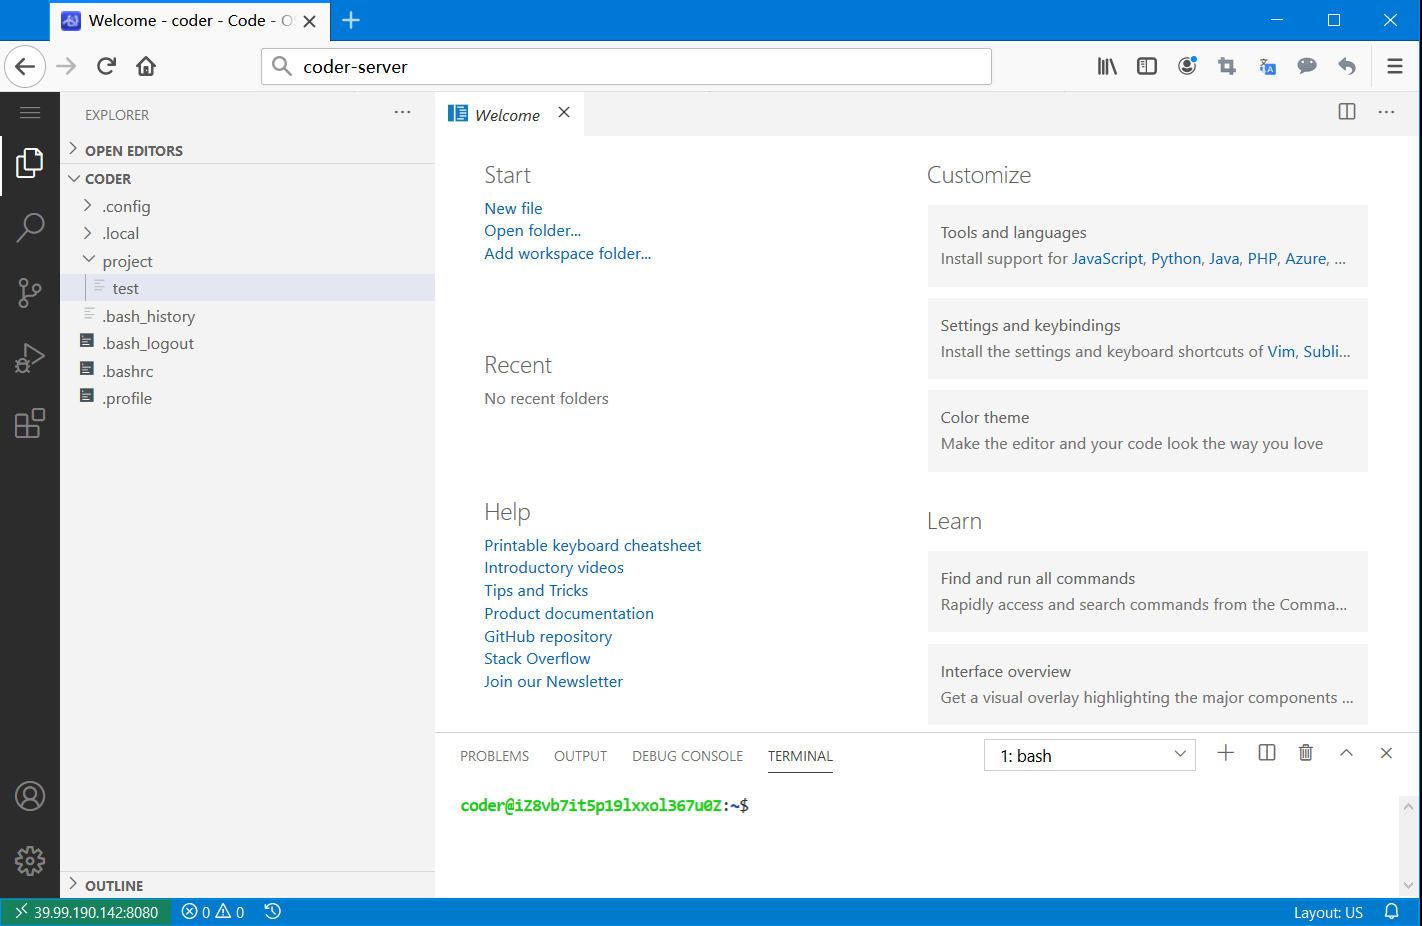
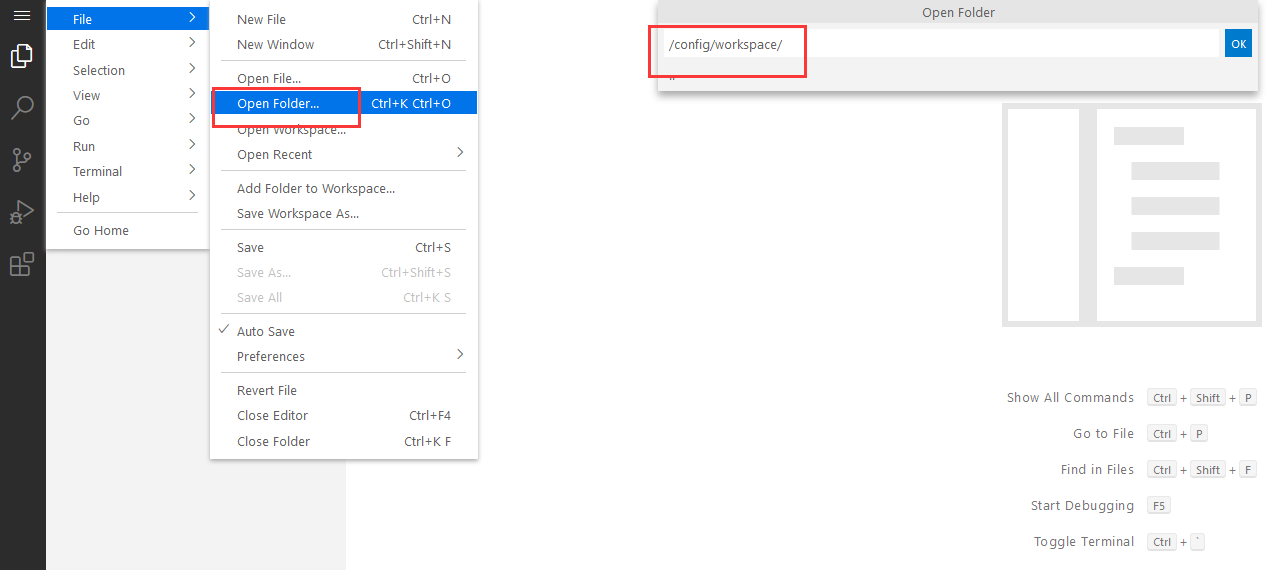
3. 在 code-server 界面上打开 workspace 文件夹
> 默认存放代码的根目录为:*/data/apps/codeserver/data/code/workspace*
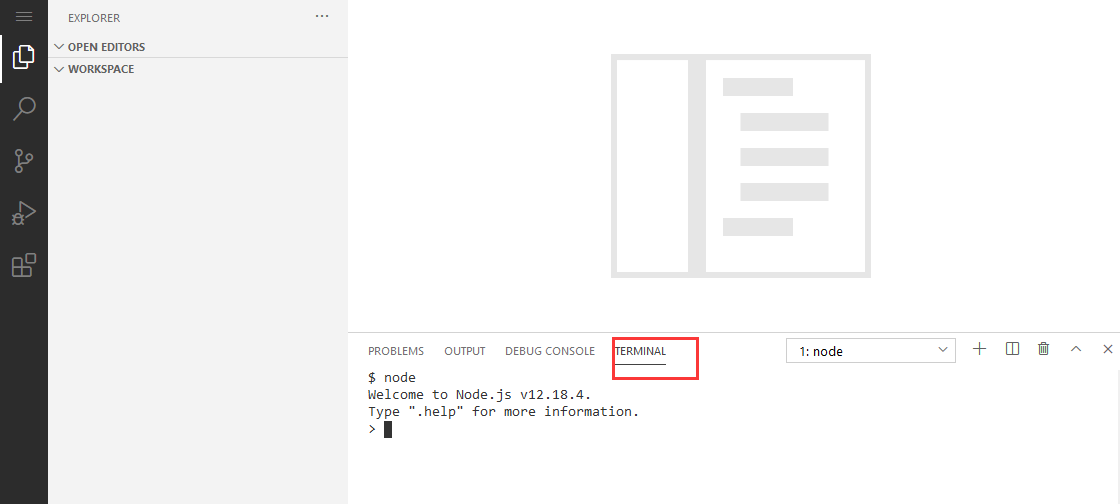
 4. 打开 Terminal,查看系统环境
 5. 安装更多开发所需的组件
#### 出现问题?[](https://support.websoft9.com/docs/codeserver#%E5%87%BA%E7%8E%B0%E9%97%AE%E9%A2%98)
若碰到问题,请第一时刻联系 **技术支持**。也可以先参考下面列出的问题定位或 **FAQ** 尝试快速解决问题。
### code-server 使用入门[](https://support.websoft9.com/docs/codeserver#code-server-%E4%BD%BF%E7%94%A8%E5%85%A5%E9%97%A8)
下面以 Python 开发为范例,介绍如何使用 code-server:
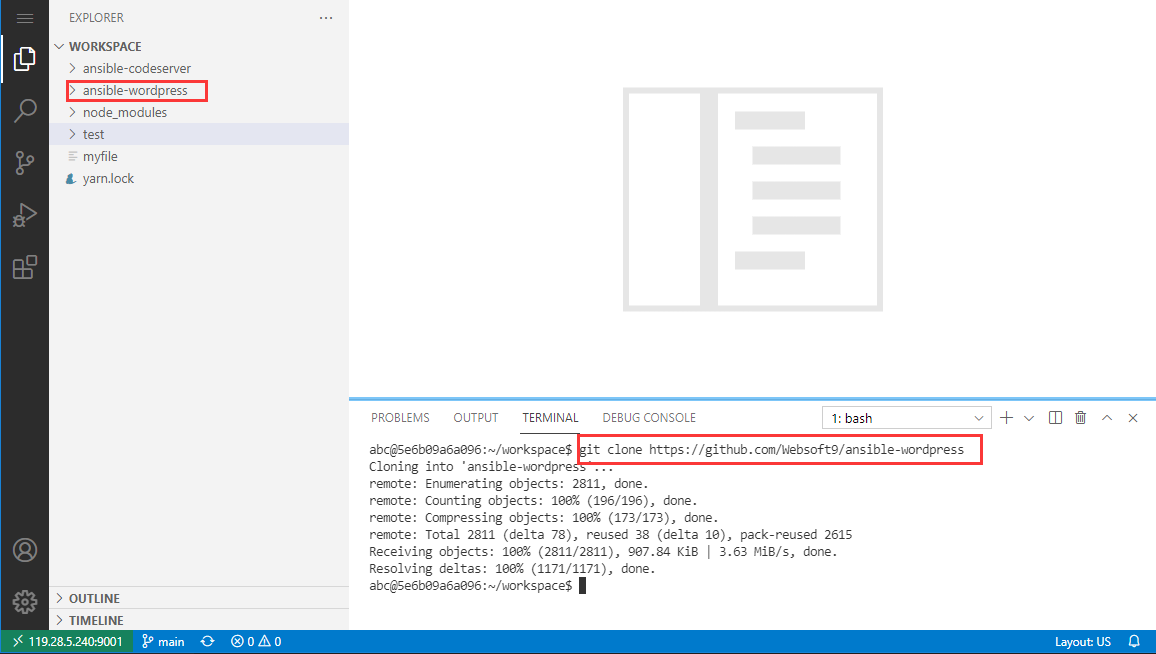
1. 登录 code-server,在当前 WorkSpace 下克隆一个代码仓库
```
git clone https://github.com/cdrt/ansible-wordpress.git
```
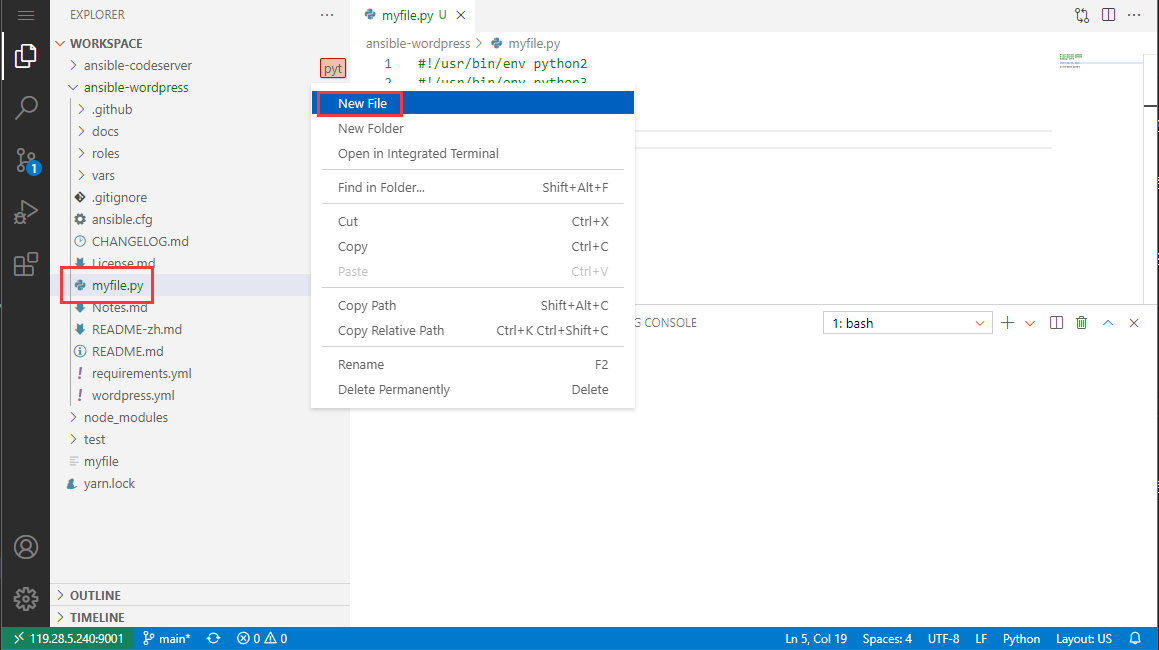
2. 在项目文件夹中新建一个文件,命名为:myfile.py,并拷贝下面的 Python 程序实例代码。
```
#!/usr/bin/env python2
#!/usr/bin/env python3
#coding: utf-8
import os, io, sys
print("hello world")
```
3. 在【窗口的终端栏】中执行 `python myfile.py` 命令,运行 Python 程序
5. 安装更多开发所需的组件
#### 出现问题?[](https://support.websoft9.com/docs/codeserver#%E5%87%BA%E7%8E%B0%E9%97%AE%E9%A2%98)
若碰到问题,请第一时刻联系 **技术支持**。也可以先参考下面列出的问题定位或 **FAQ** 尝试快速解决问题。
### code-server 使用入门[](https://support.websoft9.com/docs/codeserver#code-server-%E4%BD%BF%E7%94%A8%E5%85%A5%E9%97%A8)
下面以 Python 开发为范例,介绍如何使用 code-server:
1. 登录 code-server,在当前 WorkSpace 下克隆一个代码仓库
```
git clone https://github.com/cdrt/ansible-wordpress.git
```

2. 在项目文件夹中新建一个文件,命名为:myfile.py,并拷贝下面的 Python 程序实例代码。
```
#!/usr/bin/env python2
#!/usr/bin/env python3
#coding: utf-8
import os, io, sys
print("hello world")
```

3. 在【窗口的终端栏】中执行 `python myfile.py` 命令,运行 Python 程序
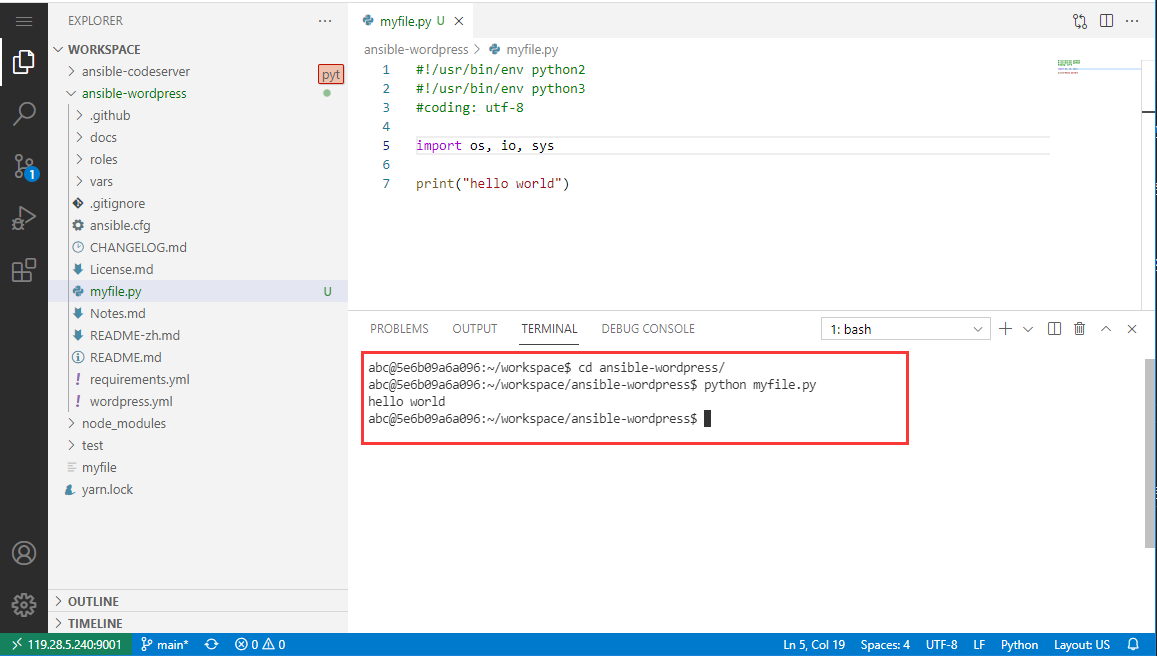 4. 查看正确的输出结果
> 需要了解更多 code-server 的使用,请参考官方文档:[code-server Documentation](https://hub.docker.com/r/linuxserver/code-server)
### code-server 常用操作[](https://support.websoft9.com/docs/codeserver#code-server-%E5%B8%B8%E7%94%A8%E6%93%8D%E4%BD%9C)
#### 安装组件[](https://support.websoft9.com/docs/codeserver#%E5%AE%89%E8%A3%85%E7%BB%84%E4%BB%B6)
若默认环境不符合需求,可以直接通过 **code-server 控制台**安装组件,下面以 JAVA 为例进行说明:
1. 登录 code-server 控制台,在【Terminal】窗口中运行 `sudo su` 切换为 root 用户
> 密码为 code-server 控制台登录密码
4. 查看正确的输出结果
> 需要了解更多 code-server 的使用,请参考官方文档:[code-server Documentation](https://hub.docker.com/r/linuxserver/code-server)
### code-server 常用操作[](https://support.websoft9.com/docs/codeserver#code-server-%E5%B8%B8%E7%94%A8%E6%93%8D%E4%BD%9C)
#### 安装组件[](https://support.websoft9.com/docs/codeserver#%E5%AE%89%E8%A3%85%E7%BB%84%E4%BB%B6)
若默认环境不符合需求,可以直接通过 **code-server 控制台**安装组件,下面以 JAVA 为例进行说明:
1. 登录 code-server 控制台,在【Terminal】窗口中运行 `sudo su` 切换为 root 用户
> 密码为 code-server 控制台登录密码
 2. 更新 apt 仓库
```
apt update
```
3. 安装并验证 Java
```
#1 安装JRE
apt-get install openjdk-8-jre
#2 验证版本
java -version
```
#### 备份环境[](https://support.websoft9.com/docs/codeserver#%E5%A4%87%E4%BB%BD%E7%8E%AF%E5%A2%83)
由于 code-server 基于容器运行,如果你打算将容器安装后的环境长期的备份下来,需要参考如下方式创建自定义容器镜像:
1. 登录服务器
2. 运行创建命令命令(基于 codeserver 容器创建一个名称为 codeserver-java 的镜像)
```
#1 创建镜像
sudo docker commit -m "add java" -a "your name" codeserver codeserver-java:latest
#2 查看镜像
sudo docker image ls
```
#### 多开发者[](https://support.websoft9.com/docs/codeserver#%E5%A4%9A%E5%BC%80%E5%8F%91%E8%80%85)
当前部署方案默认只有一个 code-server,由于它并不支持多用户,所以不合适多开发协同工作的场景。
那么如何才能支持多开发者协作使用 code-server 呢?从宏观上设计,需多开发者使用,每一名开发者分配如下资源即可实现此需求:
1. 单独分配一个宿主机的端口
2. 单独分配一个 code-server 目录
3. 单独运行一个 code-server 容器
下面是一个范例:
1. 运行下面的命令,将现有的 code-server 整个目录复制一份,命名为:/data/wwwroot/user1
```
# 复制
cd /data/wwwroot
cp -r codeserver user1
# 删除持久数据
rm -rf user1/volumes
```
2. 修改 */data/wwwroot/user1/.env* 文件中的 APP\_PORT、APP\_PASSWORD、APP\_CONTAINER\_NAME,然后保存
```
APP_PORT=9001
APP_PASSWORD=123456
APP_CONTAINER_NAME=codeserver
```
> APP\_PORT和APP\_CONTAINER\_NAME 必须与当前已经存在的 code-server 容器不同名称,否则无法创建
3. 启动新的 code-server 项目
```
cd /data/wwwroot/user1
sudo docker-compose up -d
```
由于多用户协同开发有诸多个性化需求,无法在以上方案中一一列出,欢迎提出更多需求。
### code-server 参数[](https://support.websoft9.com/docs/codeserver#code-server-%E5%8F%82%E6%95%B0)
code-server 应用中包含 Nginx, Docker 等组件,可通过 **通用参数表** 查看路径、服务、端口等参数。
通过运行`docker ps`,可以查看到 code-server 运行时所有的 Container:
````
CONTAINER ID IMAGE COMMAND CREATED STATUS PORTS NAMES
81bb4aeed134 ghcr.io/linuxserver/code-server:latest "/init" 23 minutes ago Up 23 minutes 0.0.0.0:9001->8443/tcp, :::9001->8443/tcp codeserver```
````
#### 路径[](https://support.websoft9.com/docs/codeserver#path)
code-server 安装目录: */data/apps/codeserver*\
code-server 数据目录: */data/apps/codeserver/data/code/data*\
code-server 工作目录: */data/apps/codeserver/data/code/workspace*\
code-server 扩展目录: */data/apps/codeserver/data/code/extensions*
#### 端口[](https://support.websoft9.com/docs/codeserver#%E7%AB%AF%E5%8F%A3)
无特殊端口
#### 版本[](https://support.websoft9.com/docs/codeserver#%E7%89%88%E6%9C%AC)
```
sudo docker inspect codeserver | grep org.opencontainers.image.version | cut -d: -f2
```
#### 服务[](https://support.websoft9.com/docs/codeserver#%E6%9C%8D%E5%8A%A1)
```
sudo docker start | stop | restart | stats codeserver
```
#### 命令行[](https://support.websoft9.com/docs/codeserver#%E5%91%BD%E4%BB%A4%E8%A1%8C)
容器尚未安装 CLI
#### API[](https://support.websoft9.com/docs/codeserver#api)
无
2. 更新 apt 仓库
```
apt update
```
3. 安装并验证 Java
```
#1 安装JRE
apt-get install openjdk-8-jre
#2 验证版本
java -version
```
#### 备份环境[](https://support.websoft9.com/docs/codeserver#%E5%A4%87%E4%BB%BD%E7%8E%AF%E5%A2%83)
由于 code-server 基于容器运行,如果你打算将容器安装后的环境长期的备份下来,需要参考如下方式创建自定义容器镜像:
1. 登录服务器
2. 运行创建命令命令(基于 codeserver 容器创建一个名称为 codeserver-java 的镜像)
```
#1 创建镜像
sudo docker commit -m "add java" -a "your name" codeserver codeserver-java:latest
#2 查看镜像
sudo docker image ls
```
#### 多开发者[](https://support.websoft9.com/docs/codeserver#%E5%A4%9A%E5%BC%80%E5%8F%91%E8%80%85)
当前部署方案默认只有一个 code-server,由于它并不支持多用户,所以不合适多开发协同工作的场景。
那么如何才能支持多开发者协作使用 code-server 呢?从宏观上设计,需多开发者使用,每一名开发者分配如下资源即可实现此需求:
1. 单独分配一个宿主机的端口
2. 单独分配一个 code-server 目录
3. 单独运行一个 code-server 容器
下面是一个范例:
1. 运行下面的命令,将现有的 code-server 整个目录复制一份,命名为:/data/wwwroot/user1
```
# 复制
cd /data/wwwroot
cp -r codeserver user1
# 删除持久数据
rm -rf user1/volumes
```
2. 修改 */data/wwwroot/user1/.env* 文件中的 APP\_PORT、APP\_PASSWORD、APP\_CONTAINER\_NAME,然后保存
```
APP_PORT=9001
APP_PASSWORD=123456
APP_CONTAINER_NAME=codeserver
```
> APP\_PORT和APP\_CONTAINER\_NAME 必须与当前已经存在的 code-server 容器不同名称,否则无法创建
3. 启动新的 code-server 项目
```
cd /data/wwwroot/user1
sudo docker-compose up -d
```
由于多用户协同开发有诸多个性化需求,无法在以上方案中一一列出,欢迎提出更多需求。
### code-server 参数[](https://support.websoft9.com/docs/codeserver#code-server-%E5%8F%82%E6%95%B0)
code-server 应用中包含 Nginx, Docker 等组件,可通过 **通用参数表** 查看路径、服务、端口等参数。
通过运行`docker ps`,可以查看到 code-server 运行时所有的 Container:
````
CONTAINER ID IMAGE COMMAND CREATED STATUS PORTS NAMES
81bb4aeed134 ghcr.io/linuxserver/code-server:latest "/init" 23 minutes ago Up 23 minutes 0.0.0.0:9001->8443/tcp, :::9001->8443/tcp codeserver```
````
#### 路径[](https://support.websoft9.com/docs/codeserver#path)
code-server 安装目录: */data/apps/codeserver*\
code-server 数据目录: */data/apps/codeserver/data/code/data*\
code-server 工作目录: */data/apps/codeserver/data/code/workspace*\
code-server 扩展目录: */data/apps/codeserver/data/code/extensions*
#### 端口[](https://support.websoft9.com/docs/codeserver#%E7%AB%AF%E5%8F%A3)
无特殊端口
#### 版本[](https://support.websoft9.com/docs/codeserver#%E7%89%88%E6%9C%AC)
```
sudo docker inspect codeserver | grep org.opencontainers.image.version | cut -d: -f2
```
#### 服务[](https://support.websoft9.com/docs/codeserver#%E6%9C%8D%E5%8A%A1)
```
sudo docker start | stop | restart | stats codeserver
```
#### 命令行[](https://support.websoft9.com/docs/codeserver#%E5%91%BD%E4%BB%A4%E8%A1%8C)
容器尚未安装 CLI
#### API[](https://support.websoft9.com/docs/codeserver#api)
无